


PKI for Secure Email
Tutorial Overview
This tutorial will guide you through the steps required to setup secure email using PKI and is broken down into four sections. The first is a brief overview of PKI, the resources used, and an explanation of why these applications were selected. The second section will cover to installation and configuration of Thunderbird. This will cover both configurations for IMAP and POP, which includes the installation of the two additional extensions required for POP accounts. The third section covers the installation and configuration of both GPG and Enigmail. The final section covers the creation and use of the private and public key pair. This tutorial is used in IS2771 Security in E-Commerce.
Public Key Infrastructure
This tutorial will cover the steps required to install and configure selected software components to set up Public Key Infrastructure (PKI) for use with email. The components that are used will be described later but first you must have a basic understanding about PKI and how it works.
PKI provides digital key and certificate management that enables security between parties, which allows the authentication of a person, prove ownership of a document, or communicate securely over a public communication medium. To accomplish this PKI uses public key algorithms, public and private keys, digital signatures, digital certificates, and certificate authorities (CAs).
The public key algorithms are used to create a public and private key pair and a digital certificate. Public and private keys are corresponding keys, which means that if data is encrypted with the public key it can be decrypted with the private key and vice versa. PKI uses these concepts to provide confidentiality through encryption and integrity through digital signatures. A digital signature are created by combining the data to be signed with the private key, which the recipient checks by applying the same computation to that data but uses the corresponding public key. If the data is unaltered the computations will produce identical results.
A key pair is issued to each entity who wishes to use PKI. The private key is kept strictly private while the public key is publicly distributed. The public key can be distributed in a number of ways, which are through a trusted third part acting as a key server, email, or removable media. A digital certificate provides a cryptographic binding between a public key and an individual to which public key belongs and is issued by a CA. The certificate it made publicly available, allowing others to obtain the public key and verify the ownership of that public key.
This tutorial will use three pieces of software that will allow you to setup PKI for use with email. Each piece of software is explained below giving you a brief description of what it does and why it was chosen.
Tools
Mozilla Thunderbird. Thunderbird is an email client that acts as a global inbox for one of multiple email accounts. Thunderbird comes with built- in support for a number of security measure for email but by default it does not include support for PKI. But due to Thunderbird's high level of integration it allows for easy installation of PKI software. Thunderbird also supports IMAP and POP accounts, which allows those that wish to access POP accounts the ability with the addition of two extensions. Finally Thunderbird was chosen because of its cost, which is free.
GNU Privacy Guard. GPG is the open source alternative to PGP and allows for the encryption and signing of data and communications. GPG is also compliant with the OpenPGP standard, which implements the same operating protocols and data formats as the original PGP created by Phil Zimmerman. In the PKI architecture this application acts as the CAs by managing the certificates and key pairs.
Enigmail. In following the current trend of using free applications, Enigmail is no different. Enigmail is the core to establishing PKI for it is the software that allows Thunderbird to access the authentication and encryption features provided by GnuPG.
Thunderbird
Installing Thunderbird
You can download it from www.mozilla.com/thunderbird/. Thunderbird can be used to check both IMAP and POP accounts. If you are going to use Thunderbird to check a POP account a third party extension has to be installed which can be found at http://webmail.mozdev.org/index.html. You must install the web extension and an optional component, which will be for your specific email account. Currently, this extension only supports Yahoo, Hotmail, Lycos, MailDotCom, Gmail, Libero, and AOL accounts.
Follow the on-screen instructions to install Thunderbird. Upon start up you will be asked if you want to make Thunderbird the default email program, which is not necessary. You must only configure it to use the email account where you will be sending and receiving secure mail. If you are going to use a POP account you must now install the two extensions before you can set up an email account.
IMAP Email Account Setup
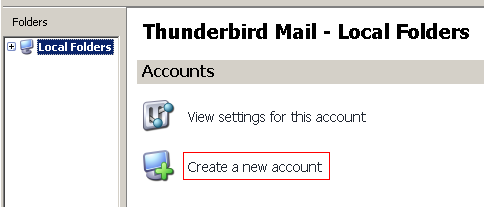
Starting Thunderbird for the first time you should be viewing the Local Folders account, which will allow you to manage all email accounts configured for Thunderbird. To create a new account click the Create new account button.
Then select create an email account.
You will be prompted to enter the name you would like to have appear in the “From” field of any outgoing message and the email address that Thunderbird will use.
To use an IMAP account select IMAP and enter the information for the incoming and outgoing servers.
The remaining set up process requires you to verify certain pieces if information more precisely the user name for your email account and your email address that Thunderbird is being configured to check.
POP Email Account Setup
Install the two extensions and restart Thunderbird to activate them. Before you setup an email account it is best to check that the WebMail extensions are running. This can be done by going to the Extension window for Thunderbird, clicking on the Webmail extension and clicking options. Go to the server menu and make sure the status of both POP and SMTP is running. Also check the Domain menu and checking both the POP and SMTP domains, which should include the domains for the email account Thunderbird will use.
The email account setup is the same as IMAP except when selecting the type of incoming server choose POP and type localhost as the name of the incoming server.
The incoming user name has to be the email address username@domain you are setting up.
The remaining set up process requires you to verify certain pieces if information more precisely that Thunderbird is being configured to check.
SMTP Setup
To setup the SMTP server select Local Folders in the Folders menu and select view settings for this account. Select the Outgoing server (SMTP) option. You can change the server name but it should already be setup for your email account along with your username that should be used. If these are not correct make the appropriate changes.
GPG and Enigmail
Installing GNU Privacy Guard
The GNU Privacy Guard for Windows can be found at http://www.gnupg.org/. As of this writing, the current version was 1.4.3. You should use one of the mirror sites to download the binary, as the main FTP site is often overloaded. Select the mirror http://mirrors.rootmode.com/ftp.gnupg.org/ and select the binary directory.
Scroll down the page and download and select the most recent version.
After you have downloaded GNU launch the GNU Privacy Guard installer and follow the instructions. Note the directory where you installed GPG, which you will need later.
Installing Enigmail for Thunderbird
You can download Enigmail from either the Thunderbird extensions page at Mozilla’s website or the Enigmail homepage. This link will take you to Enigmail's page http://enigmail.mozdev.org/download.html. The current version as of this writing was 0.94, which needs to be saved to your hard drive.
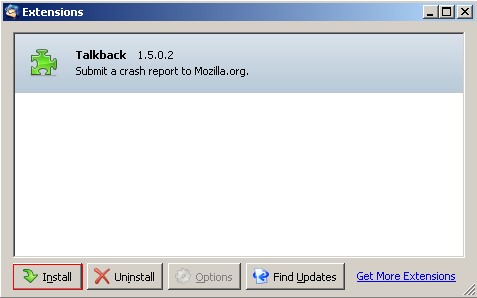
Open Thunderbird and select Tools the Extensions. Click on Install, and browse to the location where you saved the Enigmail installer.
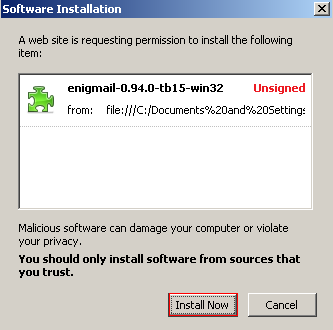
Thunderbird may warn you that the extension is Unsigned – that’s fine. Click Install Now. After the installation is confirmed you will have to restart Thunderbird before you can begin using Enigmail.
Configuring Enigmail for Thunderbird
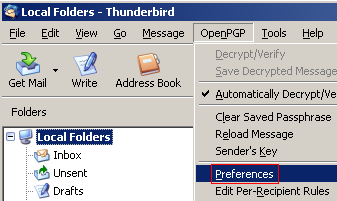
After restarting Thunderbird, you will see that an OpenPGP menu has been added to the menubar, as well as a Decrypt button in the main toolbar. Only one additional task is required to enable the use of GPG with Thunderbird, Select OpenPGP then Preferences
On the Basic Settings tab, you need to specify the path to the main GPG executable file, which is gpg.exe. Browse to the directory where you installed GPG, select the gpg.exe file, then click OK.
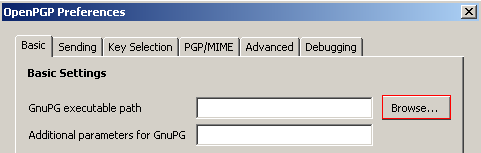
The Preferences window allows you to set other options, but setting the GPG executable path is the only required step.
Using Key Pairs
Generating a Key Pair
To generate a new key pair select OpenPGP and Key Management

Once in the Key Management window select Generate and New Key Pair

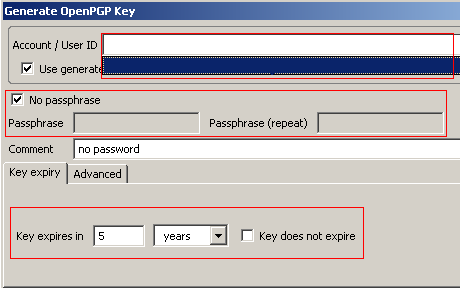
Select the account from the drop down menu to generate a key pair for. Although you can create a key pair without a passphrase, anyone who has access to your system could effectively use your private key to encrypt/decrypt mail. Enter a passphrase that is sufficiently strong, but is also something that you can remember. Optionally, you may enter a description for the key in the Comment field, which is visible on your public key. Finally, select Key Expiry and choose an expiration period.
Next select the Advanced tab and choose a key size and type. By default, GPG will create a 2048-bit key using DSA&El Gamal Click Generate Key and verify the creation of the key. As noted, the key generation process may take a minute or two.
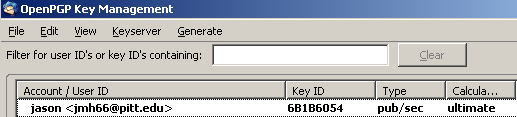
After the key-pair is generated, you will be asked if you wish to create a revocation certificate, which has to be done in order to revoke a key if your private key become compromised. Click OK to generate the certificate. You will be prompted for the passphrase you gave the key in order to complete the process. Your new key will now appear in the Key Management window.
Adding an ID to a Key Pair
If you have multiple email accounts set up in Thunderbird, you have the ability to associate and use those email addresses with the same key pair. To use the same key with multiple email addresses first you have to add an ID to the key pair. Bring up the Key Management window by selecting OpenPGP > Key Management. Then select the key pair to which you wish to add an ID.
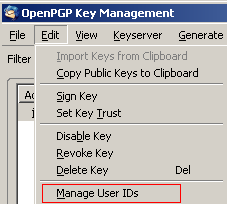
Once you have selected the key to add an ID to select Edit then Manage User IDs. You can also right click the key and select Manage User IDs.
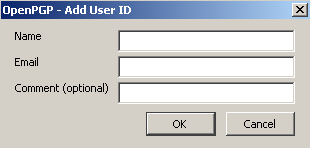
Click Add to open the Add User ID window.

Type the email address you wish to add, your name, and an optional comment. and click Ok. To set a particular address as the primary ID, select the address and hit Set Primary ID.
Uploading your Key to a Server
Although there are a number of options of making your public key available to those who wish to send secure email to you – emailing it to users, placing it on your website – one of the most convenient methods is to upload your key to a public PGP key server. Not only does this allow anyone access to your public key from an OpenPGP-enabled email client (try Keyserver and Search for Public Keys), but it also allows others to sign your key, thereby verifying that this key does in fact belong to you. In the absence of a central certificate authority that verifies your identity and the authenticity of your public key, PGP relies on users building up webs of trust by signing each other keys.
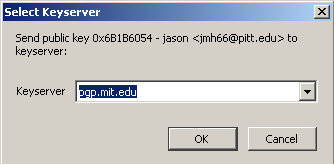
Right-click on the key you wish to upload and select Upload Public Keys to Keyserver. Select the keyserver where you will send your key (pgp.mit.edu), and click OK.
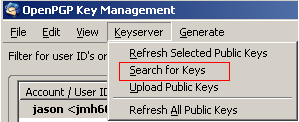
To verify, select Keyserver then select Search for Keys, and search for part of your name or email address.
Emailing Your Public Key
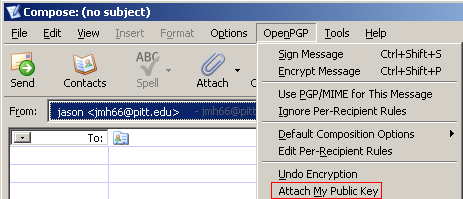
Compose a new message to whomever you are sending your key. Then select OpenPGP and Attach my Public Key. Your public key will be attached to your message as a *.asc file.
Once your public key is attached it will be visible to the left of the messages header information as seen below.
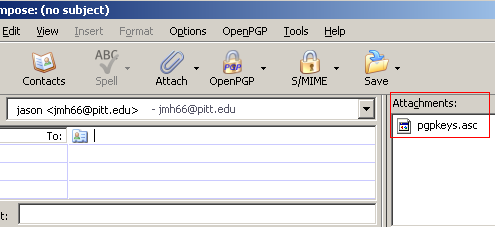
OpenGPG will ask you how you want to send the message and you should chose to send it unencrypted.
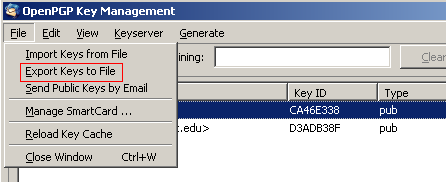
Exporting Public Key to File
Importing Public Keys from the Server
Having your own public-private key pair as only part of the equation in sending encrypted mail using PKI – you also need access to the public keys of those to whom you plan to send the secure email. Ideally, you would physically exchange public keys with others in person via CD, USB memory key, etc. to ensure that the public key really does belong to the person you think it belongs to. Obviously, exchanging public keys in person is not always feasible, so GPG and Enigmail include features allowing you to easily exchange public keys electronically, as well as verifying the authenticity of a public key by signing the key with your digital signature.
Just as you uploaded your public key to a key server, you can also download public keys from the server and attach them to your “public keyring.” Open the Key Management window by selecting OpenPGP then select Key Management. Then select Keyserver and Search for Keys. You can search for part of the person's name or email address, which you did in the previous step to check that your key was upload. Check the box next to the key you wish to import, and click OK.
Importing Keys From Email
If someone sends a message to you with their public key attached, Enigmail automatically recognizes the key and alerts you to the presence of the key. To import the key, you can select Decrypt in the Thunderbird toolbar, then click Yes to import.
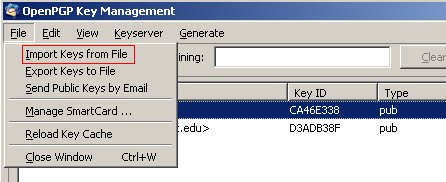
Importing Keys from a File. If you obtained someone’s public key by other means you can also import the text file containing the key into OpenGPG. Select OpenPGP then Key Management. From the menu select File and Import Keys from File.
If the file contains a valid PGP key block, Enigmail will add the public key to your list of keys. (Note: if you have ever used PGP, you can also import your public and private keyring files into GPG.)
Signing a Public Key
Before you can a send someone a secure email encrypted with the recipient’s public key, Enigmail requires that you verify that the public key is authentic. GPG does not rely on a central certificate authority (such as VeriSign) to verify the identities of those who generate key pairs; instead, it relies on key holders to vouch for each other’s identity by digitally signing others’ public keys.
Signing a public key has to be done before you can email that person using their public key. Open the Key Management windw by selecting OpenPGP then Key Management. Select the key you wish to sign and select Edit > Sign Key or right click click the key and select Sign Key.
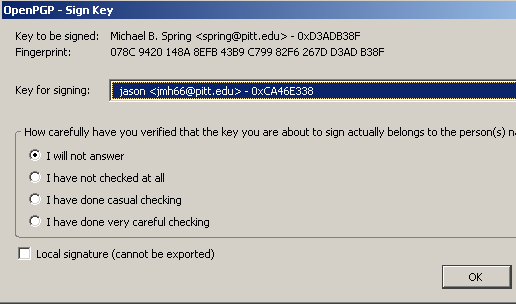
A dialog pops up asking you which key you wish to use to sign, as well as how well you have verified the identity of the key holder. Select the key and the level of verification, then hit OK. Even if you select “I will not answer” or “I have not checked at all”, the key will still be signed.
Alternatively, you can sign a key by viewing a message containing the public key to be signed, right-clicking on the pen icon Enigmail places next to the email and selecting Sign Sender’s Key. When you have signed the recipient’s public key, you will then be able to send encrypted email to them through Enigmail.
If you created your public-private key pair through Enigmail, you were asked at the end of the creation process if you wanted to create a revocation certificate for the key pair. If you believe your key pair has been compromised, you have the ability to revoke the keys by importing the key pair’s revocation certificate into Enigmail, thereby permanently nullifying the private key. If you have uploaded the public key to a key server, you can use the revocation certificate to revoke the public key by uploading the revocation certificate to the key server.
Creating a Revocation Certificate
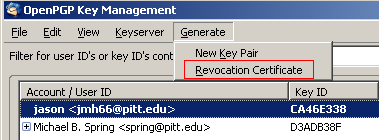
Open the Key Management window by selecting OpenPGP and Key Management, and then select the key pair you wish to create a revocation certificate for. Select Generate then Revocation Certificate or right-click on the key and select Generate&Save Revocation Certificate. You are prompted to choose a location to save the certificate. It is best to save the revocation certificate to some type of removable media that is kept in a safe place. Select the destination folder, and click Save.
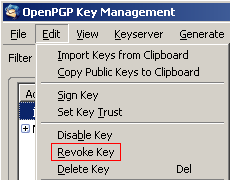
Revoke a key pair. Open the Key Management window by selecting OpenPGP then select Key Management, and then select the key you wish to revoke. Select Edit and Revoke Key (alternatively, right-click on the key and select Revoke Key.)
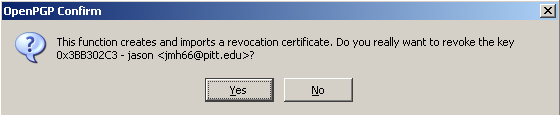
You will be prompted to allow OpenPGP to create and import a revocation certificate, which must be done to complete the revocation process. Select Yes to continue with the revocation process.
After the key has been revoked the key listing becomes italicized, gray, and marked as “(revoked).” At this point, the private key has been permanently revoked. After you have revoked the key on your system you must also revoke the corresponding key on the server to prevent anybody from using this old key.
Revoking a Key on Server
To revoke a public key open the Key Management window and select right click the key you just made a revocation certificate for and select Upload Public Keys to Server. This will upload the revocation certificate to notify others that you are no longer using that certificate.
While key servers provide a convenient, centralized repository for public keys, the management of the repository itself is the responsibility of individual users. While this decentralized approach works fine for such tasks as making valid keys available or signing each other keys, a broadly-defined search of any one of the key servers reveals the problem of cleaning up old keys. The assumption was that individual users would take responsibility of managing the removal of old keys, either by revoking the keys manually or setting an expiration date whereby the keys would be dropped by the server. Instead, many keys were set to never expire; furthermore, their owners often have either lost the private keys and/or revocation certificates or cannot remember the required passphrases.
The reality is that many of the keys on the key server may no longer be valid, and there is no way to delete the invalid keys without the revocation certificate. Managers of the key servers refuse to take requests to remove keys because they have no way to identify you as the true owner of the key, and key servers generally synchronize their keystores among each other; if a key is removed from one server, the synchronization algorithm will dutifully copy the “missing” key from another server.