


Secure Cookies
Tutorial Overview
This tutorial will guide you through the steps required to set up secure cookies. To complete this tutorial you need to have an understanding of Java servlets and Tomcat. This tutorial is divided into three sections. The first section is a brief overview of cookies and the resources used. The second section will cover the installation and configuration of Tomcat, an application server used to serve the java servlet. The final section will cover the creation and use of a cookie, created using java. This tutorial is used in IS2771 Security in E-Commerce.
Cookies
Cookies serve as a facility for servers to send information to a client, which is housed on the client’s machine from which the server can later retrieve it. Cookies are part of the header information that when used with https has decent security. There is a significant problem with using cookies, which is that a user can turn cookies off. As a developer you cannot be sure that state information is always available. A cookies value is normally an ID that is used by the server to query a database to obtain detailed information. To improve the security of a cookie, the value it holds should always be encrypted before being sent to the client, which should be base64 encoded before it is transmitted. In addition to encryption data should only be sent via a secure connection.
Java Servlets
Java servlets support the use of cookies through the ServletResponce and ServeltRequest interface. The response interface has a setCookie(cookie) method, which sets values for the cookie. The request interface has a getCookie() method, which will return a cookie.
Tomcat
Tomcat will be used as a standalone Web server, which will act as a servlet container that is used to reference Java Servlets and JavaServer Pages.
Installing Tomcat and Java
Downloading Files
Download Tomcat from http://tomcat.apache.org/. If you do not have JDK 1.5 installed you need to download and install it from http://java.sun.com/j2se/1.5.0/install_jdk1_5_06-nb50_all.html. This is the link to the J2SE Development Kit 5.0 Update 6 and NetBeans IDE 5.0 Software Bundle.
Installing JDK
When installing java you should create a directory where the JDK will be installed i.e. C:\Java. You will also have to set the PATH so both java –version and javac –help gives a result when entered in the command window.
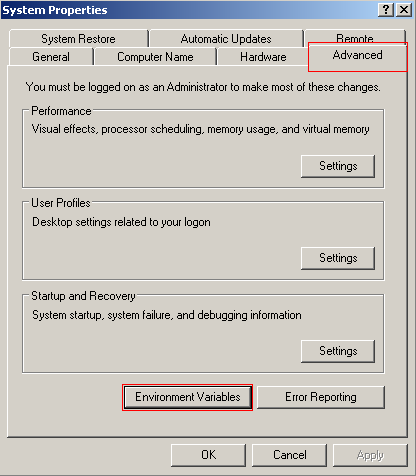
To set your java PATH variable open your System Properties window through the Control Panel and click on System. Then click on the Advanced tab and select Environment Variables.
Environment Variable for Java
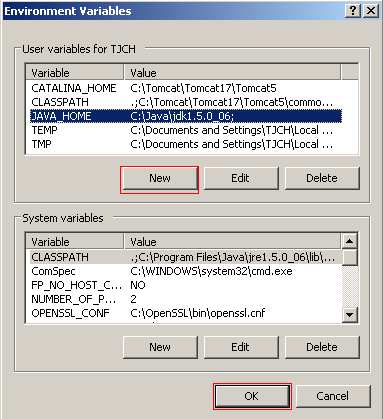
Create a new environment variable called JAVA_HOME and enter the path to the JDK, which is C:\Java\jdk1.5.0_06. Failing to set this variable properly will prevent Tomcat from calling any servlets.
Installing Tomcat
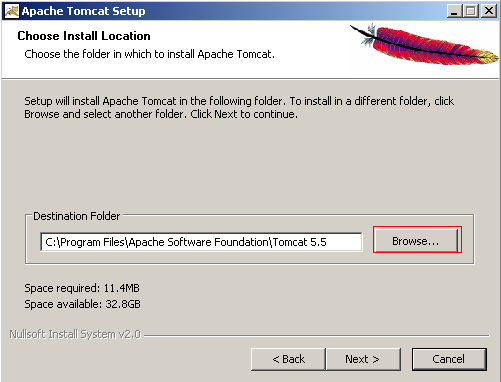
Before you being the installation of Tomcat create a folder called Tomcat under your C drive, which is where you will put Tomcat5. Start the Tomcat installer and follow the on-screen directions. When you are presented with the Installation Location screen click the Browse button to change the installation location.
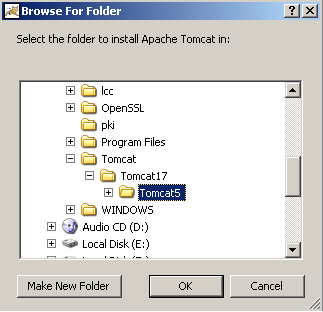
Navigate to the Tomcat folder you created in the previous step and click Make New Folder and create a Tomcat5 folder where Tomcat will be installed. Click OK to continue.
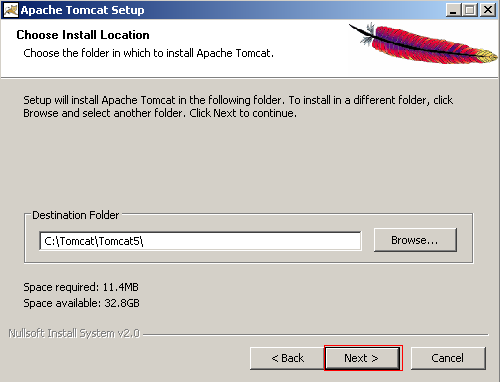
Your destination folder should now be C:\Tomcat\Tomcat5. Click Next to continue the installation.
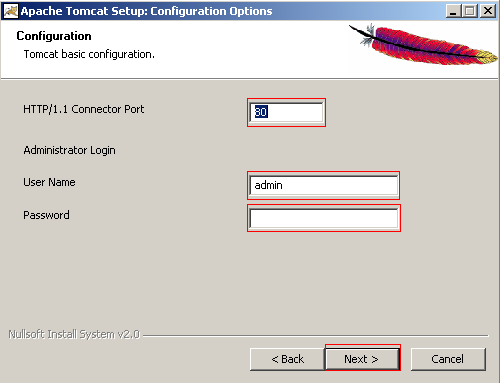
Change the HTTP Connector Port to 80, which is convenient to run Tomcat on assuming you have no other sever already running on port 80. This is the default HTTP port instead of the 8080 port Tomcat uses. This will allow you to use URLs of the form http://localhost/folder instead of http://localhost:8080/folder. Click Next to continue.
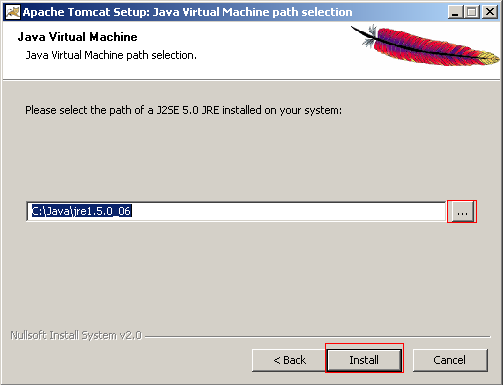
You will have to select the path of the JVM Tomcat will use. This should already be filled in for you, so all you have to do is confirm that the path is correct. If it is not click the Browse button and navigate to where the JRE is installed and click OK. Click Install to complete the installation of the JDK.
The next step is to tell Tomcat to check the modification dates of the class files or requested servlets, and reload ones that have changed since they were loaded into the server’s memory. This will degrade performance; however, if you leave this off you will have to restate Tomcat every time you recompile a servlet.
To turn on servlet reloading edit the context.xml file found at C:\Tomcat\Tomcat5\conf.
Change <Context> to <Context reloadable = “true”>.
The invoker servlet lets you run servlets without first having to make changes to your Web application’s deployment descriptor, which is the web.xml file in WEB-INF. Instead, all you have to do is drop your servlet into WEB-INF/classes and use the URL http://localhost/servlet/ServletName. This is convenient during development but should be turned off before deploying any real applications.
Uncomment the following servlet and servlet-mapping elements in the C:\Tomcat\Tomcat5\conf\web.xml file. The servlet element starts at line 100 and lookes like:
<servlet-name>invoker</servlet-name>
<servlet-class>
org.apache.catalina.servlets.InvokerServlet
</servlet-class>
. . . . . . . . . . . . . . .
</servlet>
The servlet-mapping element starts at line 351 and looks like:
<servlet-name>invoker</servlet-name>
<url-pattern>/servlet/*</url-pattern>
</servlet-mapping>
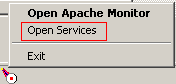
Before you continue with this tutorial you should test Tomcat to ensure that the installation was successful. Right click on the Apache Monitor icon in your task bar and select Open Services.
Right click Apache Tomcat and click Start.
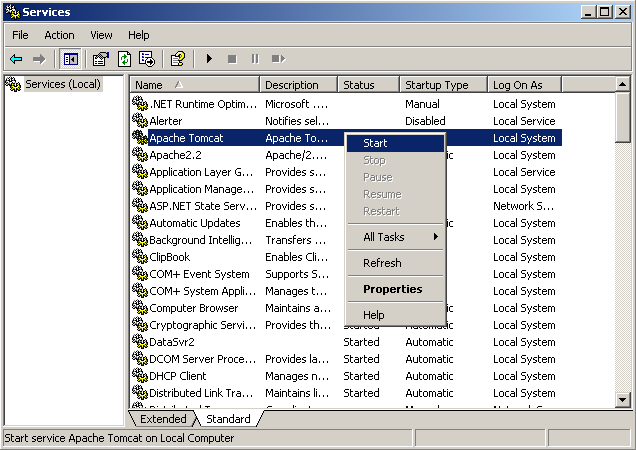
In the middle of the Apache Monitor icon there should be a green arrow, indicating that an Apache service is running. If there is still a red box like the previous image, then Tomcat did not start.

After starting Tomcat open a browser and go to http://localhost and you should get the Tomcat welcome page. If you receive an error message go back through the installation steps.
Tomcat and Servlets
To configure Tomcat to work with servlets you have to identify the servlet classes to the compiler because servlets and JSP are not a part of Java 2 platform, standard edition. You need to include the servlet-api.jar and jsp-api.jar in your CLASSPATH.
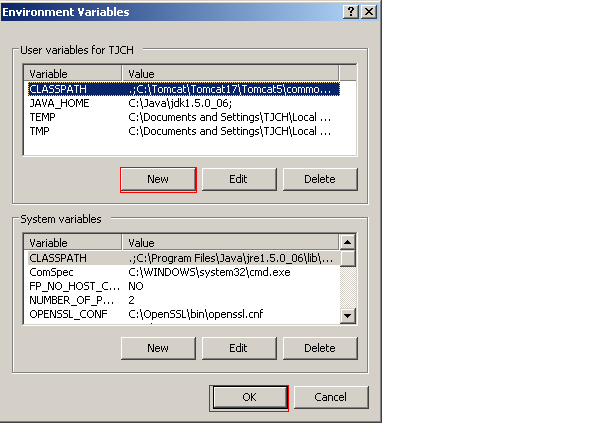
Open your System Properties window through the Control Panel and click on System. Then click on the Advanced tab and select Environment Variables.
Create a new environment variable called CLASSPATH. Enter C:\Tomcat\Tomcat5\common\lib\servlet-api.jar and C:\Tomcat\Tomcat5\common\lib\jsp-api.jar in the value for the new environment variable. You should have a . as your first entry to represent the current directory. All entries should be separated by a ;.
To test your servlet configuration open a browser and go to http://localhost and find the Examples menu on the left hand side. Check that both the JSP Examples and Servlet Examples work.
Creating a Secure Cookie
The code mentioned throughout this tutorial can be downloaded here. There are five files that are used to create, use, encrypt, and decrypt a cookie. A user will fill out the form created from CopyForm, which will be sent to CopyServlet to create a cookie. The other files are utilities that will be used throughout the cookie's life.
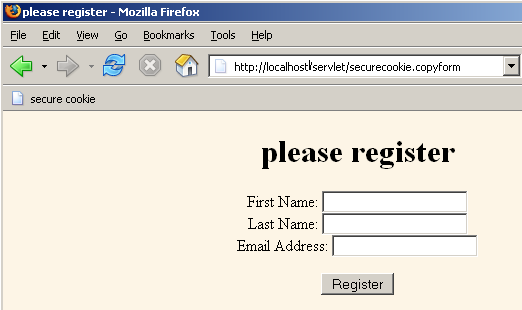
Copyform.java creates a form that the client will fill out and submit, to register. The form has to perform two functions. The first is to check for a cookie from this domain and if present it will retrieve the data related to it. The second function is to allow a client to submit their data and receive a cookie.
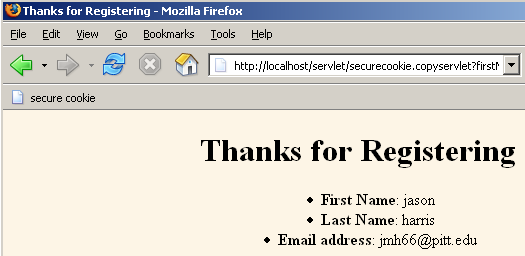
Copyservlet.java will check the data that the client submitted to ensure that the form is not blank. If the data is valid it will be saved and used to create an ID for that client. The ID will be encrypted and placed into a cookie that is sent to the client.
Classes Folder
In your C:\Tomcat\Tomcat5\webapps\ROOT\WEB-INF folder create a folder called classes. You will put all your servlets into this folder. Then inside classes create a folder called securecookie. This folder will contain all the class used in this tutorial. You created the securecookie folder because all the java files are in the package called securecookie.
Unzip SecureCookies.zip and move all the java files into C:\Tomcat\Tomcat5\webapps\ROOT\WEB-INF\classes\securecookies. Next you need to compile all the java files using the command window. Open the command window and navigate to C:\Tomcat\Tomcat5\webapps\ROOT\WEB-INF\classes\securecookies. You can compile the entire directory by using the javac *.java command.
Test Servlet Form
To make it easier to find the cookie you will receive you can clear all cookies from your browser. To access the servlet open a browser and navigate to http://localhost/servlet/securecookie.copyform, fill out the form, and press Register to submit it.
You will receive a cookie and see a thank you screen, which echoes your data.
Viewing Cookies
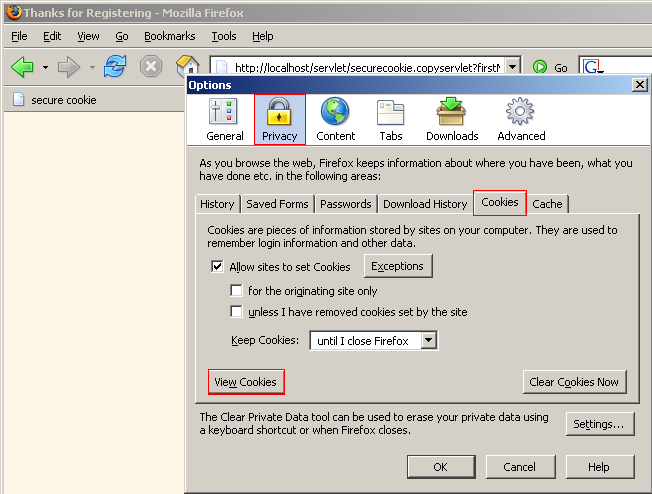
To view the cookie you were sent click on Tools and select Options. Select the Privacy icon, which is represented by a lock and select the Cookies tab. Then click View Cookies to find the cookie you received from the servlet.
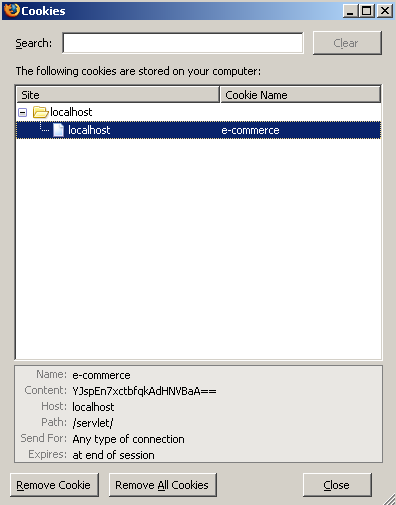
Under the Site heading find the Localhost folder, which is the site that the cookie belongs to and expand it. You will now see all the cookies that belong to that site along with their name. Click on the e-commerce cookie, which will show you the cookies’ contents.
Repeat Visitor
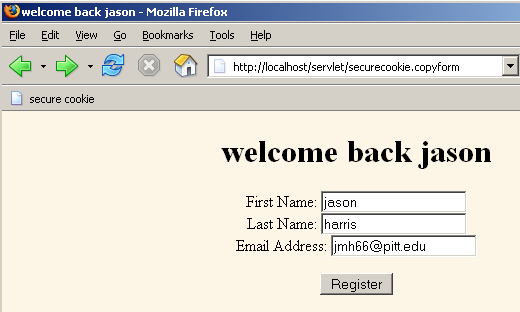
Go back to http://localhost/servlet/securecookie.copyform and you will be presented with a custom welcome screen and the form will be filled in for you.
This is a simple servlet that can only store the information from one person. It then returns that information if the browser has a cookie from localhost. To use a more complicated version of this servlet the ID would be entered into a database with the contents of the form. When a client returns the server would obtain their cookie and decrypt the ID to check it against those in the database. If a match is found then that information would be presented to the client. However, if a match is not found the client will be asked to register and then be sent a cookie.
Remember this example does not use a secure connection, which should be used in addition to encrypted to increase the security level of the cookie.