


Authenticode
Tutorial Overview
This tutorial will guide you through the steps required to sign a file using Microsoft’s Authenticode. It is assumed that you have a basic understanding of PKI and are familiar with the command prompt. This tutorial is broken down into four sections. The first section is a brief explanation of the Authenticode, .NET, and the tools used to successfully complete this tutorial. The second section covers installation of .NET and the third section covers the steps of the signer/sender. The final section covers the steps of the recipient. This tutorial is used in IS2771 Security in E-Commerce.
Authenticode
Is Microsoft's answer to ensuring an end user on the Internet that a piece of code they are about to download has not been tampered with and identifies the publisher. This allows end users to make an informed decision as to whether or not they want to download a piece of code. Authenticode does not guarantee bug free code. Authenticode relies on certificates and is based on specifications that have been used successfully for some time. There are a number of tools you will use to complete this tutorial that can be found in Microsoft .NET Framework SDK.
Microsoft .NET Framework SDK
This is SDK includes everything you need to write, build, test, and deploy .NET Framework applications. This includes the tools that are used to create a certificate, sign a file, and verify a signature on a file.
MakeCert
MakeCert is the program that is used to make a test X.509 certificate. A public/private key pair is created and will be used for digital signatures. This key pair is associated with a name and associated with a publisher’s name. The certificate is signed by using the root key or a specified key that binds your name to the public key pair.
Cert2SPC
The Software Publisher Certificate Test tool creates a Software Publisher's Certificate (SPC) from one or more X.509 certificates. Cert2spc is for test purposes only. You can obtain a valid SPC from a Certification Authority such as VeriSign or Thawte.
SignTool
The Sign Tool is a command-line tool that digitally signs files, verifies signatures in files, or time stamps files. You also have the ability to use the Sign Tool sign wizard, which has a GUI and allows users to complete the signing process with ease. You have to use the command-line tool when verifying a signature on a file.
Installing .NET Framework
You can download .NET from http://msdn2.microsoft.com/en-us/netframework/aa731542.aspx. You will have to download the most recent update to the Microsoft .NET Framework, which is the version 2.0 Redistributable Package that allows you to run applications developed using the .NET Framework. Both can be downloaded from the link above.
After you have downloaded both components install the Redistributable Package first by following the on-screen instructions. Next you will install the SDK, again just follow the on-screen instructions to complete the installation process.
Signing a File
Creating Public/Private Keys
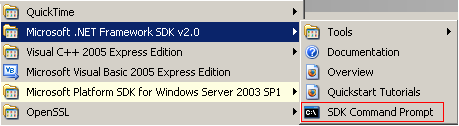
To create both the public and private keys you will use the MakeCert tool, which can be accessed via the SDK command prompt through your start. Open the command prompt by going to Microsoft .NET Framework SDK v2.0 and selecting the SDK Command Prompt under the Start Menu. This will open a command window in the SDK directory.
After you have opened the command prompt type makecert –sv private_key_name.pvk –ss storename –r –n “CN=your name” public_key_name.cer to create both a public and private key.

The command is explain in detail for better understanding.
- makecert
- sv private.pvk. The –sv flag will create a private key named private.pvk if it does not exist.
- ss myNewStore Specifies the subject's certificate store name that stores the output certificate. If the store does not exist it will be created.
- n “CN=your name” will set the issuer and the subject fields with that value
- r public.cer will create a self signed certificate called public.cer. If this option is not used the certificate will be signed by the default test root certificate.
This command is one of the basic commands that use the default values when creating keys. There are numerous flags that can be used to change or add data to the keys, which you can read about on your own.
You will be prompted to create a private key password and confirm it.
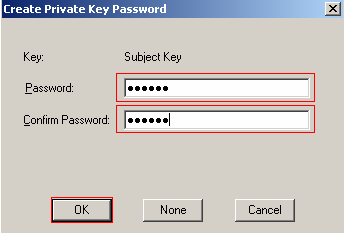
After creating the private key password you will be prompted for it again.

You should get a "Succeeded" message from MakeCert if the keys were created successfully.

If you receive an error message the problem is probably due to an incorrect private key password. Reenter the MakeCert command and you will be prompted for the private key password again. Reenter the password to complete the key creation process.
Creating a SPC File
This will wrap multiple x.509 certificates into a public key certificate standard (pkcs) #7. This program is for test purposes only. A valid SPC must be obtained from a CA. To create a SPC file using your certificate enter cert2spc public.cer spc.spc. The SPC file will be used to sign a file.

Signing a File
To sign a file you will use the SignTool, which can be accomplished by the command prompt and Digital Signature Wizard GUI. This tutorial will use the GUI, which will allow you to see the steps required to sign a file. To run the SignTool GUI use signtool signwizard.

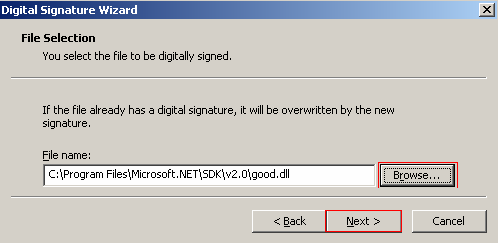
You will be presented with the Digital Signature Wizard’s welcome screen. To continue with the wizard click Next. You will then be presented with the File Selection screen, which will allow you to select the file you wish to sign. You can only sign .exe, .dll, or .ocx files with Authenticode.
You can download the good.dll to sign. However, all you have to do is choose an executable off your machine to sign.
Click the Browse button and navigate to the location of the file you wish to sign and select it. After choosing a file to sign click the Next button to continue with the wizard.
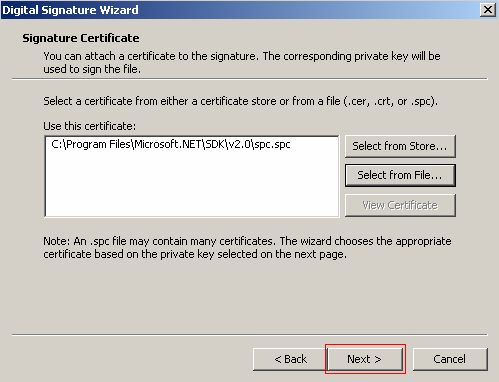
After selecting the file to sign you must chose the certificate to attach to the signature. This file will be the .spc file that was created using your public key. To select the .spc file click Select from File then navigate to the location of the .spc file and select it.
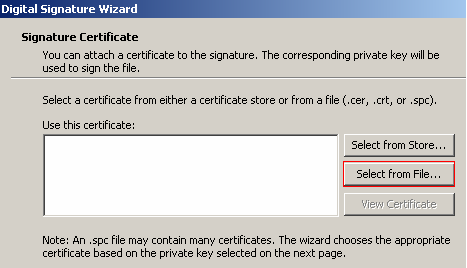
After selecting the certificate to be attached to the signature click Next.
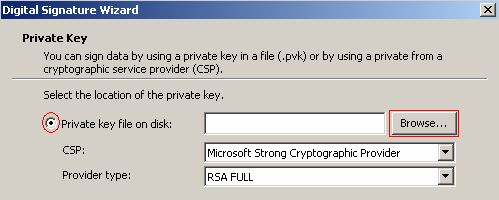
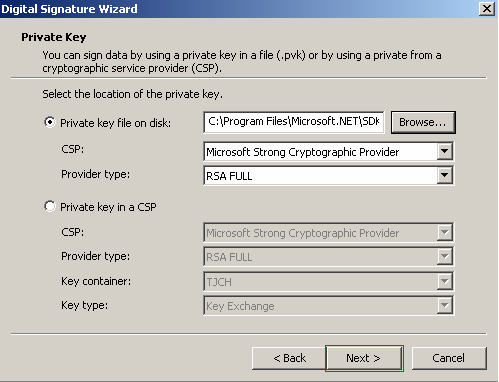
Now you must select the private key you want to use to sign the file. To do this select Browse and navigate to the location of your private key and select it.
After selecting the private key select Next where you will be prompted for the private key’s password. Without this you will not be able to complete the signing process.
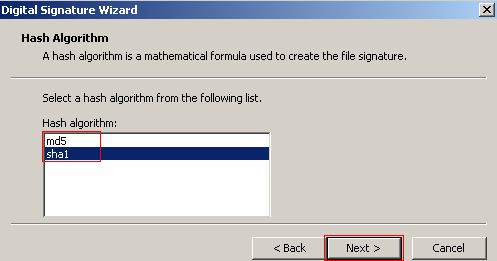
The next step is to select the hash algorithm you want to use to create the file signature. SHA1 is the default option and is acceptable to keep. The SHA1 hash algorithm produces a 160-bit (20 byte) message digest, which will slow implementation but is stronger against a brute force attack. The MD5 produces a small message digest at 128-bit (16 byte) that makes for a fast implementation but is weaker again brute force attacks.
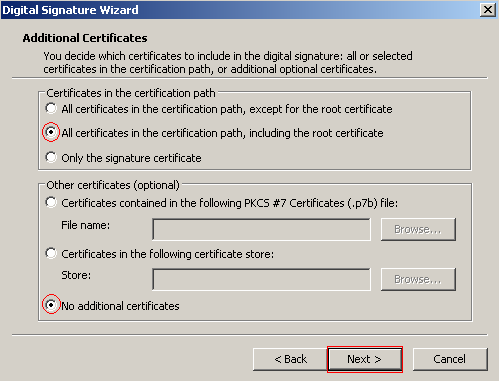
You have the option to include additional certificates in the signature, which is common practice when you obtain a certificate from a CA. However, in this tutorial you created a self signed certificate so there are no other certificates that need to be included with the signature, which is why the default settings were kept. Modifications to the additional certificate settings depend on your specific requirements when signing a file. Click Next to continue.
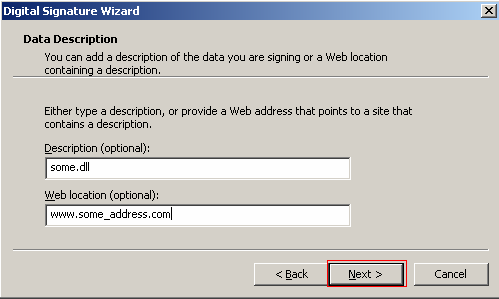
It is a best practice to include information about the data you are signing and a Web site where a person can find additional information pertaining to the signature. You can enter this information or just continue to the next step by clicking Next.
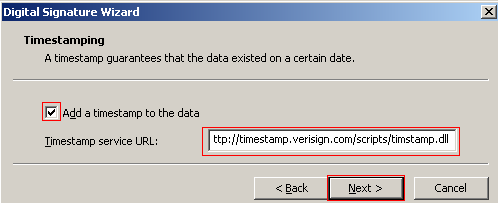
A time stamp should always be included with every signed file, which indicates to the public when the file was signed and its existence. To sign a file you need to provide the URL of a timestamping service. You can use Verisign’s service at http://timestamp.verisign.com/scripts/timstamp.dll. After you have entered the timestamp URL click Next to continue.
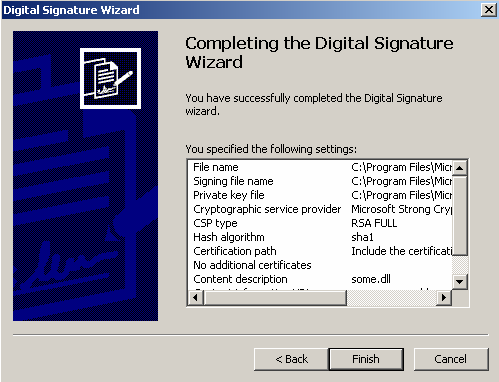
You now can verify the options you will use to create the signature. If there is anything that you missed or want to double you have the opportunity to do it here. When you are satisfied click Next to complete the signing process.
You will be prompted for your private key’s password as the final step in completing the signing wizard. After you provide the password click Next to generate the signature for the selected file.
The final step is to make your public key available to the public along with the file you signed.
Verifying a Signature
Verify Signature
You must have the certificate from the signer in order to verify the signature of a file. All Authenticode will do is recomputed the hash value and compare it to the hash value that is provided in the signature. If the values match then the file has not been compromised. This does not guarantee that the file is not dangerous, just that it has not changed since it was signed.
To see the importance of installing and trusting the signers certificate you can try to verify the signature without installing the certificate. To verify a file's signature use the command signtool verify –v good.dll
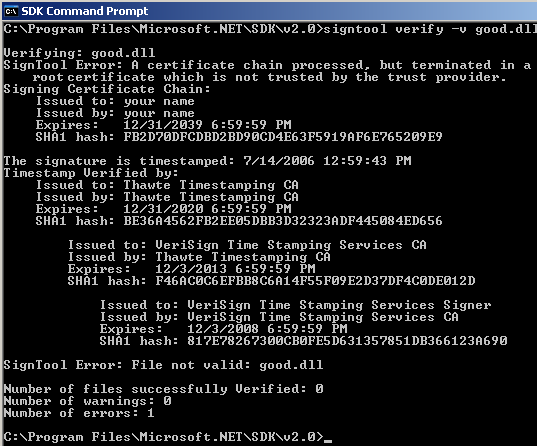
The command id described in some detail to provide a better understanding.
- signtool
- verify. indicates the action you want to perform
- v good.dll. specifies the file you want to check for a signature
Install Certificate
Navigate to the public certificate, which is at the SDK's installation directory and double click it to open the certificate window. Click on Import Certificate to open the certificate import wizard. Follow the on-screen instructions to import the certificate. You can keep the default settings to import the certificate.
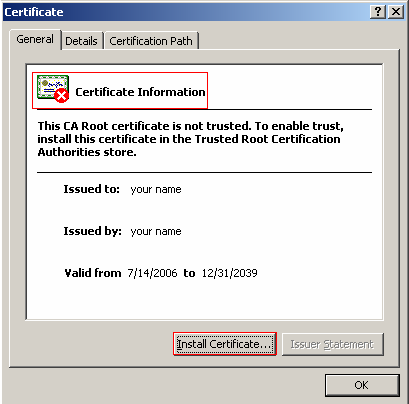
You will be prompted to confirm the installation of the certificate because it was not granted by a CA. This is done because once you install a certificate Windows will automatically trust any certificate issued by this CA, which can lead to dangerous situations if the certificate is not coming from a trusted party. Click Yes to install the certificate.
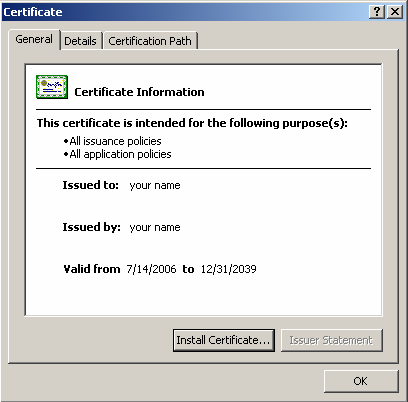
You can now close the certificate window and reopen it to see that the certificate is now trusted. This is indicated by the absence of the red ‘X’ over the certificate image in the upper left hand corner of the window.
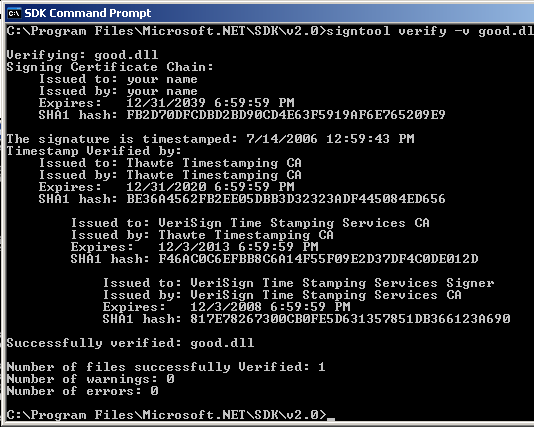
Reverify the Signature
Now you can verify the signature by using the same command as before, which is signtool verify –v good.dll.
Verifying a Compromised File
To see how Authenticode acts when a compromised file’s signature is being verified, download the bad.dll, which is a modified version of the original after being signed. Verify the signature on this file by using the same command: signtool verify –v bad.dll.
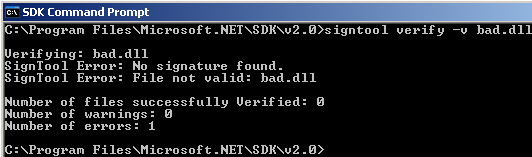
You should see this error message because the original signature does not match up with the signature you computed.