


Apache SSL
- Tutorial Overview
- Installing Apache, OpenSSL, and Mod_SSL
- Creating a Certificate
- Configuring Apache with Mod_SSL
Tutorial Overview
This tutorial will guide you through the steps required to configure Apache with SSL. This tutorial is divided into four sections. It is assumed that you have a basic understand of PKI. The first section is a brief overview of SSL and the components required to complete the turorial. The second section will cover the installation of Apache. The third section will cover the creation of a SSL certificate and the final section covers that steps required to configure Apache with SSL. This tutorial is used in IS2771 Security in E-Commerce.
SSL
Short for Secure Sockets Layer, a protocol developed by Netscape for transmitting private documents via the Internet. SSL uses a cryptographic system that uses two keys to encrypt data, a public key known to everyone and a private or secret key known only to the recipient of the message.
Apache2
The Apache HTTP Server is a commercial-grade, open source implementation of a web server.
OpenSSL
OpenSSL is an open source toolkit implementing the Secure Sockets Layer and Transport Layer Security protocols as well as a full-strength general purpose cryptography library. The openssl program is a command line tool that is used for the various cryptography functions and will be used to create and manage your private keys and certificates.
Mod_SSL
This module provides cryptography for Apache via the Secure Socket Layer and Transport Layer Security protocols with the help of OpenSSL.
Installing Apache, OpenSSL, and Mod_SSL
Apache
The current version of Apache is 2.2.3, however, this tutorial was completed using version 2.2.2. Download the Apache_2.2.2-win32-x86-no_ssl from one of the mirrors at http://httpd.apache.org/download.cgi.
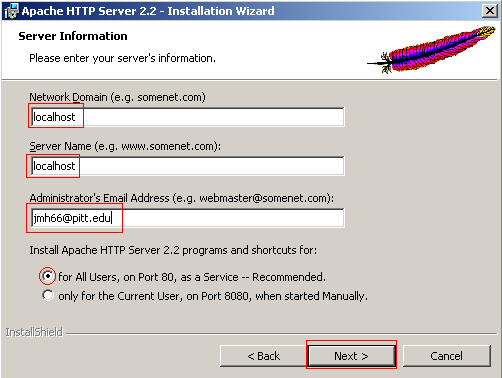
To start the installation of Apache run the installer. Follow the on-screen instructions. At the server information screen enter localhost for the Network Domain and Server Name. Enter your email address and click Next to continue.
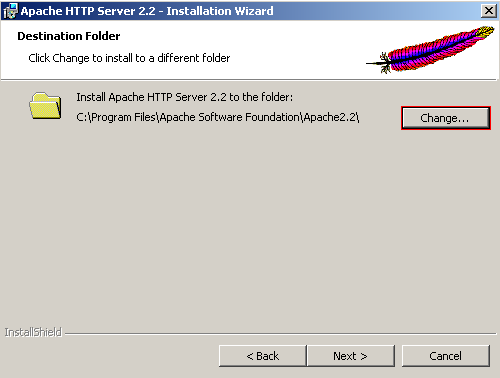
When you are presented with the Destination Folder selections select Change. Create the directory structure C:\Apache\Apache2 on your hard drive.
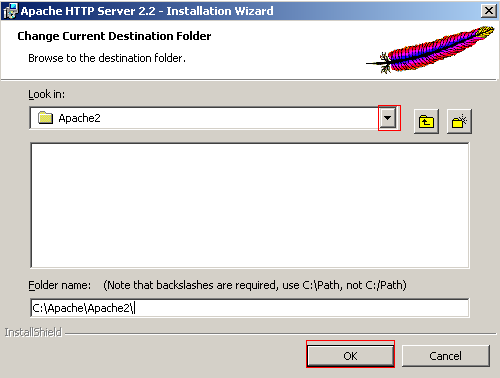
Change the destination folder to the newly created folder Apache2 folder and click OK to continue.
Continue following the on-screen instructions to complete the installation of Apache. When completed test your install by opening a browser and going to http://localhost/
OpenSSL and Mod_SSL
You can download OpenSSL at http://hunter.campbus.com/. You need to download Apace_2.2.2-Openssl_0.9.8b-Win32.zip. Extract the contents of the zip to a new directory.
Copy the ssleay32.dll and libeay32.dll from the bin folder of the Apache/modssl distribution directory to WINNT\System32. This is important; ensure that you copied the correct files from Apache to the correct location.
You will need a config file for OpenSSL.exe, which you can find here. Move the file to the directory OpenSSL.exe is in, which is found in Apache/modssl under the bin folder. The openssl.cnf file is a normal text file; however, Windows will hide the extension from you.
Creating a Certificate
Creating a Certificate Request
You now have to create a certificate to be used when clients connect to your server using https. The first step in obtaining a SSL certificate is to create a certificate request. Open the command window and navigate to the location of Apache/modssl. Type in openssl req -config openssl.cnf -new -out my-server.csr. This will create the certificate request and a private key.

You will be prompted to enter a PEM pass phrase and then to verify it. Enter 12345 or you can enter your own pass phrase. This is used to protect your private key from being read or modified by an unauthorized individual.

Now you must enter the information that will be entered into your certificate. Enter the geographical, organizational, and contact information. You will also be prompted to enter extra attributes, which is a challenge password that will be sent with your certificate. Enter test or create your own password. Press Enter to create your certificate request.
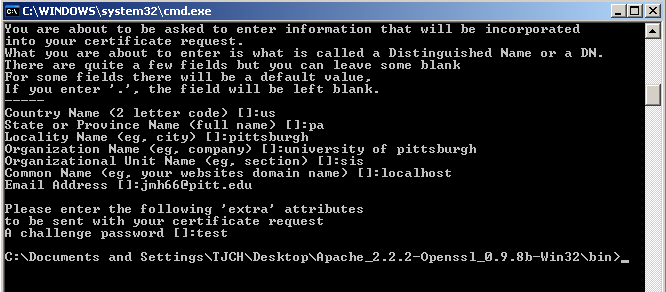
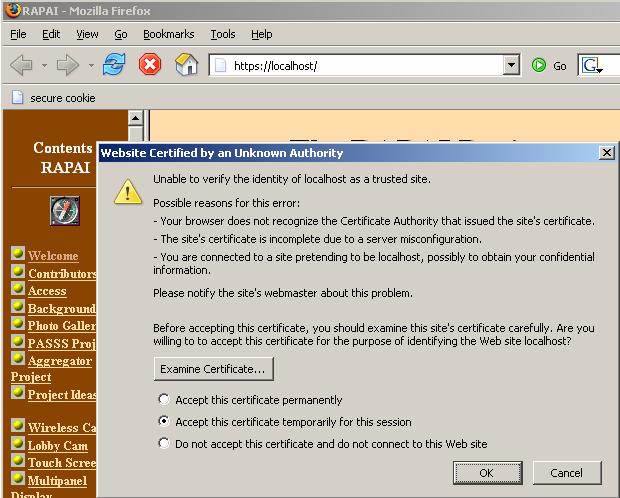
When asked for the Common Name or the Domain Name, give the exact domain name of your server. If the name does not match browsers will produce a warning message about the name mismatch when clients visit the site.
Remove Pass Phrase
Now you need to remove the pass phrase from the private key you just created. Your private key should only be readable by the Apache server and the administrator, which is done using the pass phrase. Enter openssl rsa -in privkey.pem -out my-server.key to remove the pass phrase from the private key.

You will be prompted for the pass phrase you created from your private key to complete the task. Enter 12345 or the pass phrase you created and press Enter to continue. The output is your private key without the pass phrase attached.
You should also delete the .rnd file created in the Apache/modssl bin folder because it contains the entropy information for creating the key and could be used for cryptographic attacks against your private key.
Creating a Certificate
Now you can create your certificate using the certificate request you generated earlier. This certificate will be self signed. Enter openssl x509 -in my-server.csr -out my-server.cert -req -signkey my-server.key -days 365

Importing your Certificate and Key
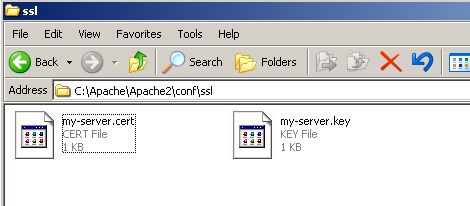
To import your key and certificate into apache you must create a folder to hold them, which will be ssl. Create the ssl folder under Apache/Apache2/conf and copy my-server.key and my-server.cert into it. Your key and certificate was created in Apache/modssl under the bin folder.
Configuring Apache with Mod_SSL
Stop Apache and copy the exes and dlls from the bin folder in Apache/modssl into the Apache/Apache2 bin folder. If you may receive a file replacement message, which is ok. Click Yes to All to continue.
Next paste the mod_ssl file from the modules folder in Apache/modssl into the modules folder in Apache/Apache2.
Open the httpd.cnf file found in Apache/Apache2/conf and locate the LoadModule directives, which is found toward the beginning of the file and uncomment LoadModule ssl_module modules/mod_ssl.so
After the </IfModule> add
		SSLMutex default

		SSLRandomSeed startup builtin

		SSLSessionCache none


		<VirtualHost www.my-domain.com:443>

		SSLEngine On

		SSLCertificateFile conf/ssl/my-server.cert

		SSLCertificateKeyFile conf/ssl/my-server.key

		</VirtualHost>
You must edit the domain in the <VirtualHost www.my-domain.com:443> to be localhost. The line should appear as <VirtualHost localhost:443> Save the file and exit.
In the httpd.cnf file uncomment line 614, which is Include conf/extra/httpd-ssl.conf, by removing the #.
Open the httpd-ssl.cnf file found in conf/extras and edit the paths of your key and certificate. Fine the reference to your SSL certificate, which is at line 99. Change the location so Apache can find your certificate. The line should read SSLCertificateKeyFile C:/Apache/Apache2/conf/ssl/my-server.cert
Then go to line 107 and edit the location of where Apache can find your key. The line should read SSLCertificateKeyFile C:/Apache/Apache2/conf/ssl/my-server.key. Save the file and exit.
Open a command window and navigate to Apache/Apache2/bin and enter httpd.exe. This will start Apache using the SSL modifications. If there is an error with the httpd.cnf or httpd-ssl.cnf file you will get an error message. If you attempt to start Apache through the Apache Monitor and there is an error you will not receive a message other then Apache could not start. To close Apache in the command window press ctrl + c and restart Apache using the monitor.
Open a browser and navigate to http://localhost and https://localhost to ensure that your server is working correctly.